Ubuntu 服务器通过本机 ClashX Meta 加速 GitHub
在 Ubuntu 服务器上开发时,可以通过 SSH 远程端口转发,借用 Mac 上的 ClashX Meta 代理访问 GitHub。本文记录从本机代理检查、SSH 隧道配置,到 Git 代理设置与移除的完整步骤。
1. 使用场景
本地电脑
- macOS
- 使用 ClashX Meta
- 使用 Cursor / VS Code Remote SSH 登录服务器
- ClashX Meta HTTP 代理端口为
7890
远程服务器
- Ubuntu
- 通过 SSH 登录
- 通过 HTTPS 执行 GitHub 仓库的
clone、pull和push
目标: Ubuntu 服务器本身不安装 VPN,而是通过 SSH Remote Port Forwarding,将服务器上的代理请求转发到 Mac 的 ClashX Meta,从而加速 GitHub 访问。
整体链路
Ubuntu Server
      │
      │ HTTP Proxy
      ▼
127.0.0.1:7890
      │
      │ SSH RemoteForward
      ▼
Mac 127.0.0.1:7890
      │
      ▼
ClashX Meta
      │
      ▼
    GitHub
Ubuntu Server
│
│ HTTP Proxy
▼
127.0.0.1:7890
│
│ SSH RemoteForward
▼
Mac 127.0.0.1:7890
│
▼
ClashX Meta
│
▼
GitHub2. 确认 ClashX Meta 代理端口
查看 Mac 上 ClashX Meta 的配置,例如:
port: 7890
socks-port: 7891
allow-lan: falseport: 7890
socks-port: 7891
allow-lan: false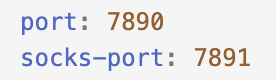
其中:
7890:HTTP Proxy7891:SOCKS 5 Proxy
本方案使用 HTTP Proxy,即 7890。
测试 Mac → ClashX Meta → GitHub
在 Mac 本地终端执行:
curl -x http://127.0.0.1:7890 https://github.com -Icurl -x http://127.0.0.1:7890 https://github.com -I如果出现类似输出:
HTTP/1.1 200 Connection established

HTTP/2 200
HTTP/1.1 200 Connection established
HTTP/2 200则说明以下链路访问正常:
Mac → ClashX Meta → GitHubMac → ClashX Meta → GitHub3. 配置 SSH RemoteForward
编辑 Mac 本机的 SSH 配置:
nano ~/.ssh/confignano ~/.ssh/config假设原来的服务器配置为:
Host my-server
HostName <服务器 IP>
User <用户名>
Port <SSH 端口>Host my-server
HostName <服务器 IP>
User <用户名>
Port <SSH 端口>添加以下配置:
RemoteForward 7890 127.0.0.1:7890RemoteForward 7890 127.0.0.1:7890最终配置如下:
Host my-server
HostName <服务器 IP>
User <用户名>
Port <SSH 端口>
RemoteForward 7890 127.0.0.1:7890Host my-server
HostName <服务器 IP>
User <用户名>
Port <SSH 端口>
RemoteForward 7890 127.0.0.1:7890参数含义:
RemoteForward 7890 127.0.0.1:7890
│ │
│ └── Mac 上的 Clash HTTP 代理端口
│
└── Ubuntu 上创建的监听端口RemoteForward 7890 127.0.0.1:7890
│ │
│ └── Mac 上的 Clash HTTP 代理端口
│
└── Ubuntu 上创建的监听端口它等价于:
ssh -R 7890:127.0.0.1:7890 my-serverssh -R 7890:127.0.0.1:7890 my-server配置完成后:
- 保存
~/.ssh/config。 - 断开 Cursor / VS Code 当前的 Remote SSH 连接。
- 重新连接
my-server。
4. 测试完整代理链路
重新连接服务器后,在 Ubuntu 服务器终端执行:
curl -x http://127.0.0.1:7890 https://github.com -Icurl -x http://127.0.0.1:7890 https://github.com -I如果出现:
HTTP/1.1 200 Connection established

HTTP/2 200HTTP/1.1 200 Connection established
HTTP/2 200则说明以下代理链路已经连通:
Ubuntu → 127.0.0.1:7890 → SSH RemoteForward → Mac ClashX Meta → GitHubUbuntu → 127.0.0.1:7890 → SSH RemoteForward → Mac ClashX Meta → GitHub5. 为 Git 配置全局代理
如果服务器长期用于开发,需要频繁执行 git clone、git pull、git fetch 和 git push,可以在 Ubuntu 服务器终端中为 Git 设置全局代理:
git config --global http.proxy http://127.0.0.1:7890
git config --global https.proxy http://127.0.0.1:7890
git config --global http.proxy http://127.0.0.1:7890
git config --global https.proxy http://127.0.0.1:7890检查配置:
git config --global --get http.proxy
git config --global --get https.proxygit config --global --get http.proxy
git config --global --get https.proxy正常情况下应输出:
http://127.0.0.1:7890
http://127.0.0.1:7890http://127.0.0.1:7890
http://127.0.0.1:7890配置建议: 建议只配置 Git 的代理,不要在
.bashrc中为整个 Ubuntu 设置http_proxy/https_proxy,以免影响服务器上的其他程序。
6. 克隆与同步 GitHub 仓库
本方案使用 HTTPS URL,例如:
git clone https://github.com/youyu847/gem5_ramulator2.gitgit clone https://github.com/youyu847/gem5_ramulator2.git由于已经配置 Git 全局代理,因此无需再手动指定:
https_proxy=http://127.0.0.1:7890https_proxy=http://127.0.0.1:7890进入仓库:
cd gem5_ramulator2cd gem5_ramulator2之后即可正常执行:
git pull
git fetch
git pushgit pull
git fetch
git push这些 HTTPS Git 请求都会自动经过以下链路:
Git → Ubuntu 127.0.0.1:7890 → SSH 隧道 → Mac ClashX Meta → GitHubGit → Ubuntu 127.0.0.1:7890 → SSH 隧道 → Mac ClashX Meta → GitHub7. 关闭与恢复 Git 代理
如果暂时不需要代理,可以删除配置:
git config --global --unset http.proxy
git config --global --unset https.proxygit config --global --unset http.proxy
git config --global --unset https.proxy检查配置是否已删除:
git config --global --get http.proxy
git config --global --get https.proxygit config --global --get http.proxy
git config --global --get https.proxy没有输出即表示配置已删除。
需要时可重新开启:
git config --global http.proxy http://127.0.0.1:7890
git config --global https.proxy http://127.0.0.1:7890git config --global http.proxy http://127.0.0.1:7890
git config --global https.proxy http://127.0.0.1:78908. 完全移除 SSH 隧道
如果不再需要该功能,请从 Mac 的 ~/.ssh/config 中删除:
RemoteForward 7890 127.0.0.1:7890RemoteForward 7890 127.0.0.1:7890然后断开并重新建立 SSH 连接即可。
9. 注意事项
注意:Mac 必须保持在线。
整个链路依赖 Mac 和 ClashX Meta。出现以下任一情况时,服务器上的
127.0.0.1:7890将无法正常代理 GitHub 请求:
- Mac 关机或休眠
- ClashX Meta 关闭
- VPN / 代理节点失效
- Cursor / VS Code Remote SSH 连接断开
恢复 ClashX Meta 并重新建立 Remote SSH 连接后,代理即可恢复。
总结
利用 SSH RemoteForward 将 Ubuntu 服务器的 127.0.0.1:7890 映射到 Mac 上 ClashX Meta 的 127.0.0.1:7890,再让 Git 的 HTTP / HTTPS 请求使用该代理,即可在服务器无需安装 VPN 的情况下,通过本机 ClashX Meta 访问 GitHub。